
HOW TO MAKE CAKE POPS
It’s birthday season around our house, and I can’t think of a better way to celebrate than by stuffing our faces with cake pops! I’ve enjoyed making these for years, but they haven’t always turned out the way I imagined (sometimes they’ve earned a spot over at Pintrosity :). I thought I would do a quick tutorial with tips and tricks I have learned over the years – so you don’t ever have to worry about ending up on Pintrosity too! Cake pops really are easy to make, I know everyone says that about their masterpieces, but they really are!

INGREDIENTS:
- CAKE – Your favorite flavor!
- ICING – Whatever type you like!
- CHOCOLATE – White, Chocolate, Peanut Butter Chips, etc.
Cake pops are a great addition to have in your food storage. You can always make your cake & icing from scratch, and use the chocolate you preserved!
Even if all the stores shut down, I have all the ingredients to make cake pops so we don’t miss out on a single party all year-long! So after you try making these, start stocking up on party food for your home!

1- BAKE A CAKE
Bake a cake just like you normally would. It can be from scratch – from a box – leftover birthday cake – it doesn’t really matter!

2- CRUMBLE THE CAKE
Once your cake is cool, crumble it very fine! I like to cut the cake into sections and take one piece out at a time and crumble it into a bowl. Try and remove any chunks or crusty pieces (I usually eat them ;)!
This step is where a lot of people struggle. If you don’t want your cake pops to look like they have warts growing everywhere, you need to make sure you stay calm and crumble on.
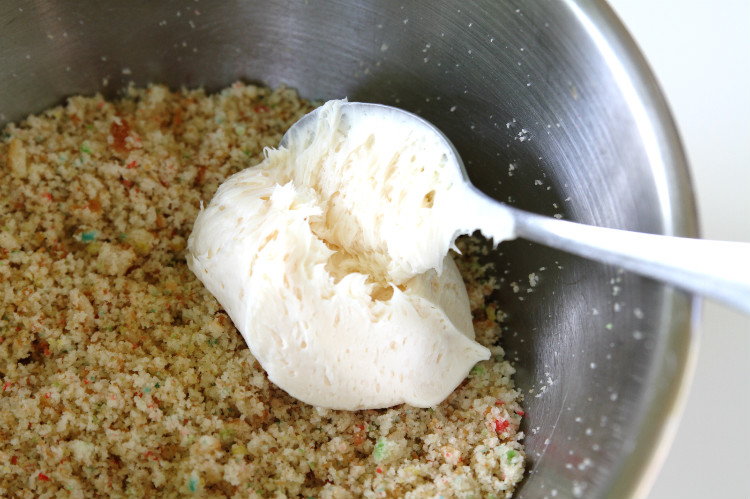
3- ADD FROSTING
Once you feel good about your crumble job, it’s time to add the frosting. For a 9×13 cake, add 3/4 of a 16 oz. container of frosting to the bowl and mix it all together.
You shouldn’t need more frosting, but if it still seems dry, add some more. Be careful though, because if you add too much frosting the cake balls will slide right off the stick.

4- SHAPE INTO 1 1/2 INCH BALLS
Form into 1 1/2 inch balls (or whatever size you like your balls), and place them on a wax covered baking sheet.
A 9×13 cake will make anywhere between 36-48 balls.
5- PUT CAKE BALLS IN TO THE FRIDGE
Cover with plastic wrap and place the cake balls into the fridge for at least 30-60 minutes so they can firm up. I used to put them in the freezer, but they would get too cold and would crack after the chocolate hardened. So avoid the freezer if possible, and let them firm-up in the fridge.
6- MELT CHOCOLATE
Melt the chocolate in the microwave for 30 second intervals and then stir. To prevent burning or ending up with lumpy chocolate, don’t overheat!
You want the chocolate to be runny and smooth. If you need to make it more runny, add a little bit of shortening. If you notice the chocolate starting to harden-up again, pop it back into the microwave for another 30 seconds.
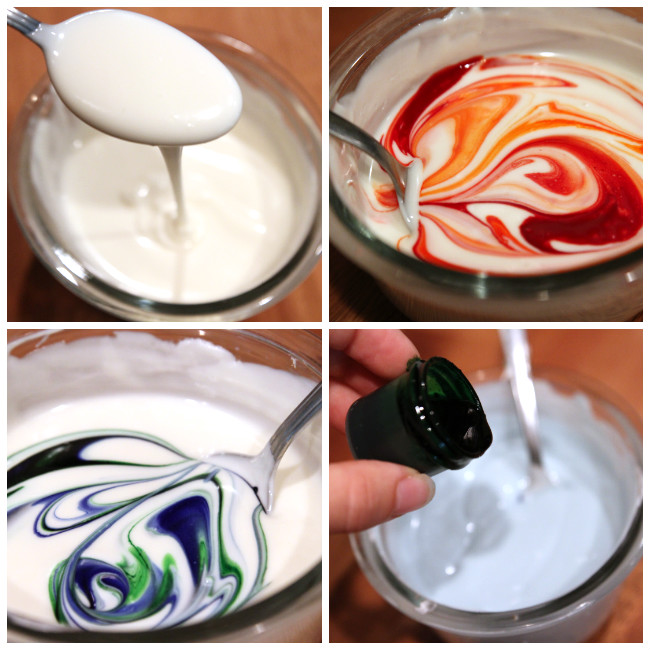
7- COLOR THE CHOCOLATE (optional)
You can just keep the plain chocolate the way it is, or you can make it any color you want! You need to have special candy coloring for the chocolate; food coloring doesn’t work well (I’ve tried)! Mix and match colors until you achieve the color you desire, or at least something close!
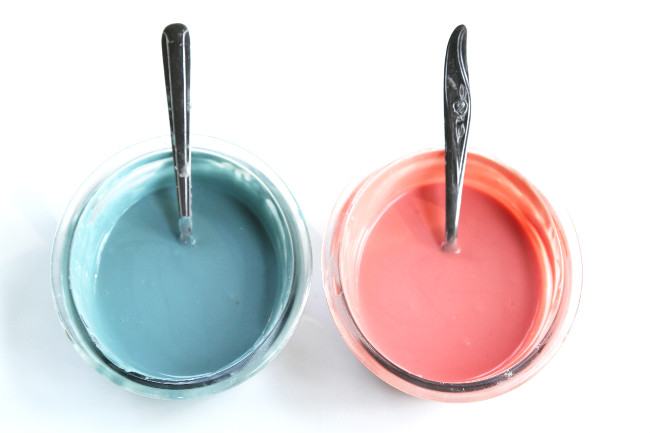
I’m a little obsessed with coral and teal right now, if you couldn’t tell ;)

8- PUT CANDY COLORING AWAY!
This step is critical. If you forget to put the candy coloring away, you run the risk of having your baby climb up on the counter and turn herself (and the couch) blue! Then when you decide to go to the pool instead of giving her a bath, the lifeguard will ask you if you fed your baby a Smurf for dinner ;)

9- DIP THE CAKE POP IN CHOCOLATE
Now you’re ready to start dipping!
- Grab a stick, and dip one end into the chocolate.
- Then take the end with the chocolate and stick it half-way into the cake ball. (Only grab 1 or 2 balls from the fridge at a time, or else they will get too soft and slide off the stick.)
- Roll the cake pop in the chocolate, and use a spoon to finish covering the entire cake pop.
- Once the cake pop is covered entirely with chocolate, tap off any excess chocolate while spinning it slowly.

10- DECORATE THE CAKE POPS
The sky is the limit when it comes to decorating cake pops! If you don’t believe me, hop on over to Bakerella to see the creations she’s come up with!
Some of my favorite cake pop decorating items are:
- SPARKLING SUGAR
- CANDY COLORING
- PEARLS
- SHIMMERING FOOD COLORING (my favorite is the pearl color)
- SUCKER STICKS (there are a variety of sizes)
Make sure to put sprinkles on your cake pops before the chocolate hardens! I like to put a bowl under the cake pop to catch-all the leftover sprinkles so I can keep re-using them!
You can also let the cake pops harden and put designs on the outside by piping chocolate in whatever design you want and putting sprinkles on it if you want.
I just recently saw the shimmering food coloring at the store and had to buy it. The pearl finish is my favorite color and helps give the cake pops a beautiful finishing touch.
If your kitchen isn’t a total disaster when you’re finished, then you need to go back and figure out which step you missed! There needs to be sprinkles stuck to everything and everyone by the time you’re done decorating these cake pops!
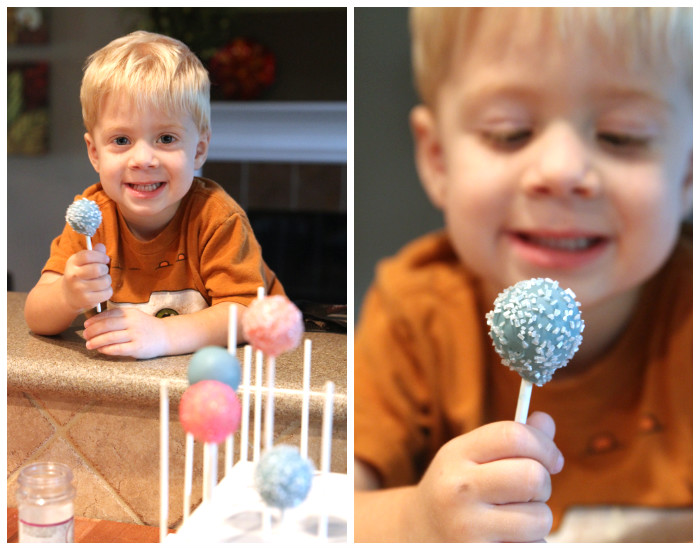
*HIRE A GUARD*
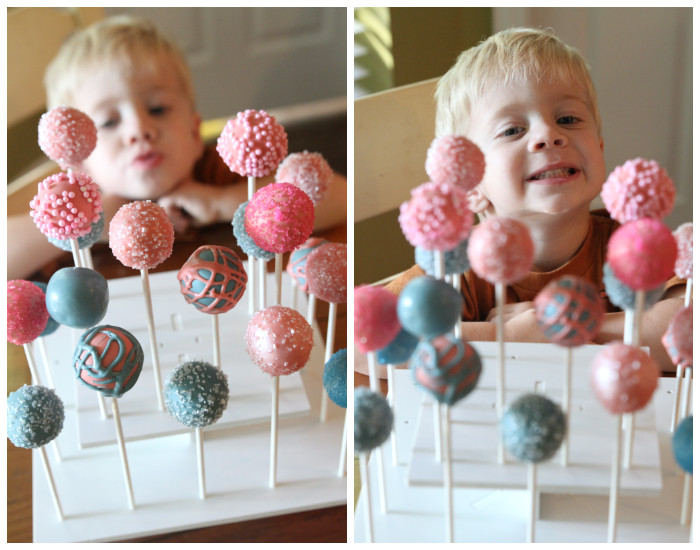
Last, but not least! You MUST hire a guard to watch over these or they’ll start walking away!
My 2-year-old is available for hire & happy to help you out. He’s cheap too, as long as you give him a cake pop he’ll sit there and guard them all day!
BE CREATIVE!
Have fun experimenting with your design and going as elaborate or as simple as you want! There are so many fun ways you can jazz these pops up! So go ahead, have some fun!
Here are my favorite cake pops I’ve ever made! They were very simple to do, just don’t ask how long they took me!

*By the way, I got the cake pop stand from The Smart Baker. I absolutely love it, I just wish I had bought it sooner! They didn’t pay me to say that either!
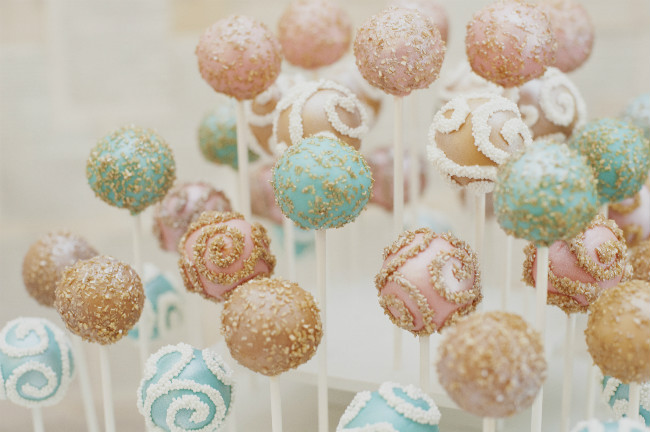
*Cake Pop Pictures by Christa Elyce Photography
So even though my baby turned blue, and my kitchen’s a wreck, I thought the cake pops turned out pretty perfect! Not a single one was left, so I’ll take that as a success!
ADD CAKE POPS TO THE PANTRY!
Party food & desserts were probably the 1st thing I added to my pantry. Life’s just so much more fun when you can celebrate it! Plus, you never know when your favorite bakery might be closed, or the stores won’t have what you need – so having some party food in your panty is a good idea (at least I think it is)!
Have you stalked-up on any of your favorite party food yet? Please tell me I’m not the only one ;)

I love number eight the best!
Me too ;) – just not the cleaning the couch part!
Absolutely beautiful! I can’t believe they’re homemade. Looks like something from a Paris Patisserie. And love the smurf eating babe…just too precious.
Thanks Julie! They were fun to do, they just take forever. I love my Smurf baby, even if she colors my couch blue.
Can I make these day before the party??? Or how would you do that Bc I wouldn’t have time day of
Yes, you can make them like a week before if you wanted. They last about 2 weeks or so in the fridge.
Beautiful!!
PLEASE HELP!! Your pops are amazing! So…I have been doing cake pops for almost 3 years now and as I’m sure you know, there are SO many different tricks/styles, etc. for making these things. Anyway, I just got my first real, non friend/family member order–for a wedding!!
One of her colors are coral (gray and purple are the others) I’ve never really worked with this kind of color combo and I don’t think I want to use candy melts(plus I’m not even sure they have coral) how did you make yours? Would you recommend that I just buy a bunch of bark and dye it myself? I’ve always just used Wilton candy melts, so I’m a little nervous and in need of a few words of wisdom! What would you do, considering keeping things inexpensive, tasty and BEAUTIFUL!
Also, do you always use box cake? I do and they taste great, but I’m nervous of them thinking it isn’t as professional, but google can’t find me any answers to that question! UGH please help?! THANK YOU!!
Awesome! Good luck with the wedding!
Yes, I always just use the white almond bark at Wal-Mart – much cheaper and I can dye it whatever color I want. Just make sure you get the candy color to dye the chocolate. Food dye won’t work very well. I found my dye at Hobby Lobby or online.
I think they might taste better if I had an awesome cake recipe, but I always use a box mix. They are so time consuming already, I haven’t bothered trying to make my own cake yet.
Anyways, good luck. You’ll do great!
Hi, I’m wondering about the colors that you used for your favorite cake pops. That color combo is so pretty and elegant and I would love to recreate it. Thanks!
I used candy coloring to color the white chocolate bark.
FOR THE COLORS:
TEAL – I mixed a little blue and green together.
LIGHT PINK – I added a little bit of red to the white chocolate.
GOLD – I may have used peanut butter wafers for this one – can’t remember.
It’s been a little while, but I think that is how I created those colors!
Hi there, great tutorial! How long do the pops typically last in the refrigerator? I would hate to make them 4 days before a party and they taste stale or don’t hold up as well that long by I typically like to prepare my party goodies days early. Any advice on this would be great
Since you coat the cake in chocolate you don’t have to worry as much about them going stale. I think they last about 2 weeks in the fridge and 2 months in the freezer.
I think 4 days in advance would be just fine! Good luck!
I love the cake pop tips they are so helpful and easy to make
I love number eight the baby is
Hi, this looks amazing. Looks like you’ve really outdone yourself here. I have not been successful with cakepops in the past, and I just recently got an order for a few(I’m fundraising my trip to China to study abroad for a month this summer), and I was wondering what you would recommend. Should I make the cake, crumble, and mix with frosting? Or, should I use a cake pop pan? Would one be better than the other, or would they both work the same? Thank you.
I’ve never used a cake-pop pan so I can’t really say how well they work. Good luck with the order!
What brand and kind of chocolate and candy coloring so you use? I need to make some for my cousin’s baby shower this Saturday and I could use some tips. The first time I made them, they didn’t turn out so well.